Greenhouse Building Part 2: Framing
- mm19713
- Jun 11, 2023
- 4 min read
Welcome to part 2 of the mighty greenhouse build.
When I bought the blueprints for my greenhouse, I knew ai wanted to alter them to suit my needs and what I envisioned it to look like. My changes impacted my supply list as well as the time it took to build it. Despite the blueprints telling me I could build it in a weekend (maybe if there was more than one of me and I was a master builder), the process took me most of the summer.
I was fortunate enough to purchase 39 2x2x14 slightly used boards on Facebook Marketplace that would become my frame. Having the longer boards actually meant less waste for me as I could used the smaller cut pieces for bracing between studs as well as on the roof between the trusses.
First, I built the sides. I needed to ensure that I left enough space for each of my sliding glass doors. I also had a row of windows along the top. I spaced them out to be the width of the glass I also purchased on Facebook Marketplace so it would reduce the amount of cuts I had to make (more on my lesson learned about glass later).

Based on my measurements, I placed three boards in the centre for extra support and also so I could attached the frame of the sliding glass door to it. Having already obtained my doors, I could ensure that I had the openings the correct size.

Next, I created the top window openings.
As a teacher, I have heard "when are we ever going to use this?" so many times. Well children, right here is where you learn the value of Pythagorean theorem. Keeping things square in a build is vitally important. I measured corner to corner a lot. One thing I was super happy I did was screw everything in. Screws are much easier to undo mistakes than nails and I unscrewed boards a lot as I learned. Although an auto-nailer would have been faster, being able to unscrew and adjust as needed, was definitely the right decision for me.
Next step was to build the back wall. I added lots of cross pieces to add additional stability.

Then, the next sidewall. Thanks to my son's help with putting them in place, this was fairly easy. We did test out the openings for the sliding glass doors by inserting the doors while they were on the ground as it was easier to make adjustments in the ground.


Finally, the front wall was put together. Again, having the French Doors meant I could make the opening the correct size. You will need to add additional room for the hinges and/or casement if your doors are prehung. My doors were not prehung, I added 5/8" on each side (sides and top) to allow for fitting the doors properly.


After we installed, a good friend pointed out that my headers (above the doors) was incorrect. I needed a 2x6 across the top. As well I needed to add additional stud pieces above the heade This will help support the roof. Again, I was super thankful for screws over nails.


With the walls up and done correctly, I decided to stain the wood. Greenhouses are notorious for wood rot. Given that the wood so was using wasn't pressure treated, I needed to stain the wood to keep it from rotting. I chose a white opaque stain that had a 10 year warranty so I know it will last. Staining the wood now meant I can ensure that areas that might be covered with wood later will have an additional layer of coverage.

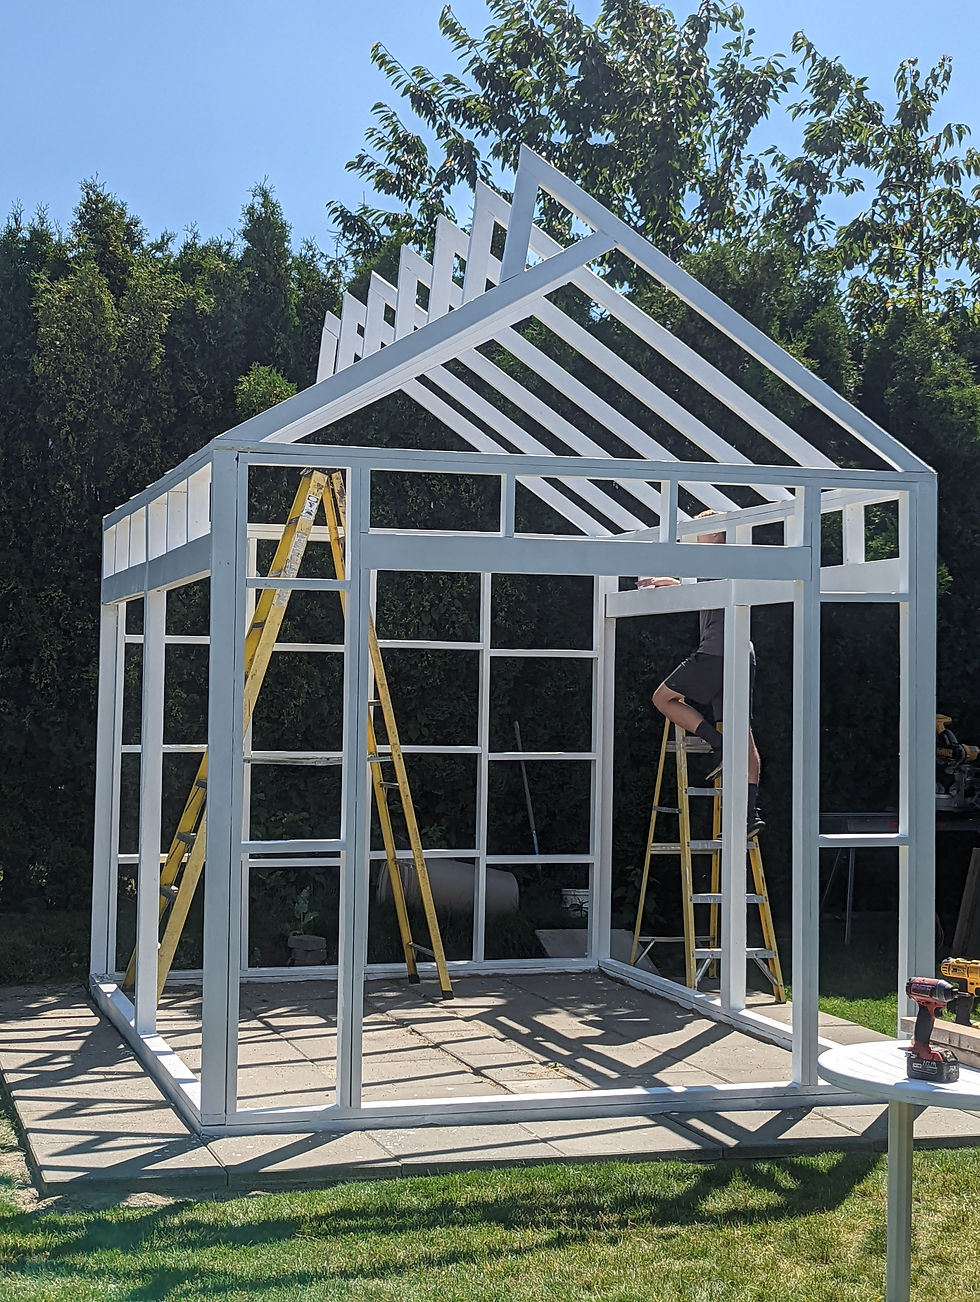
Next, it was time for the trusses. These were finicky to make. I needed to ensure that there was a truss every 24" on centre because of the width of my roofing material. They also needed to be exactly the same (there were angles to work with). If they weren't identical, it would impact the window openings. I learned a valuable lesson here. A few of mine were not exactly the same and it meant I had to redo them. Making sure your wood has no warling is also critical.

I painted these too before the installation. It was easier to do it on the ground than up on the ladder.


Installing the trusses is definitely a two person job. You will want to ensure that they are perfectly straight as it will skew your window openings if you don't (lesson learned). Once they were up, I added connecting pieces that would make the bottom window sill and join the trusses together. It's imperative that these pieces are level. This is difficult to do. I didn't do this well enough and my window openings were not perfectly square. It is something I will need to go back and fix after the fact. It's much easier to do it right at this stage.

The next step was to add bracing between the trusses. This adds stability to the roof and also gives me places to secure my roofing material.
With the framing now complete, it's time to build the upper windows and install the doors and windows. That will be part 3 of this series.
With the greenhouse taking shape, I am in love with the potential opportunities. As my garden is in full swing at this point, I can really start to see where things will go. As you might have seen in the photos, I purchased square 4 gallon buckets for my peppers. For now, I have them surrounding the greenhouse. These will be housed in the greenhouse once it's completed. It has helped me see how the space might be used.
Stay tuned for Part 3: Window and door installation.
Finding joy in the process and lessons learned along the way.
-The Joyful Gardener-


Comments